Showing posts with label Lipstick. Show all posts

Wednesday, March 27, 2013

Long Time No See

I've been sick and very very busy at work, so that's my excuse. Sorry I've been away for awhile. I'm preparing for a trip to France for two weeks.

Going to Paris and cycling the Loire Valley. Please comment below and let me know what you'd like to see. I'm thinking of doing a simple travelogue, and, of course, in Paris, there will be some makeup and some fashion, because that place is modelopolis twenty-four seven - lots of eye candy everywhere.

Here is a collection of looks from the last two weeks, and some products I hadn't gotten around to photographing, and my little depotted palette of lippies for your viewing enjoyment!


 I've had this Sleek cream base palette for a while and am finally getting around to using it. Thinking of taking it to Paris, but I'll be test driving it first. Planning on putting it over my MAC Soft Ochre paint pot to see if it will crease or not. I love the variety of colors in there!

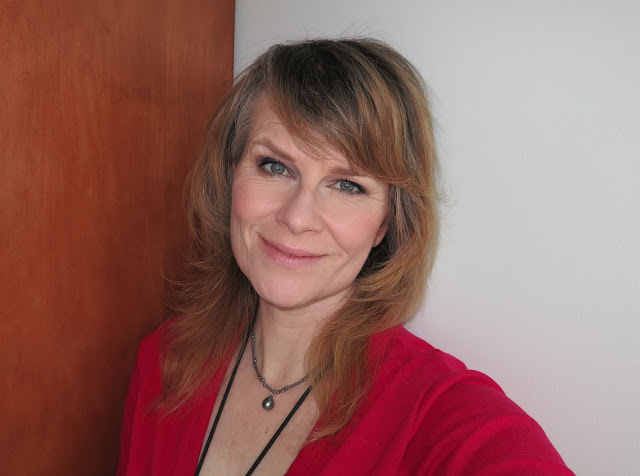
 On this day I was wearing a cherry-colored cardigan, so I thought I'd pull the blue out of it and onto the center of my lids with some irridescent Naked Cosmetics Twilight action. This Twilight collection has lovely iridescent cool tones. I used the darker periwinkle in this set. These pigments are lovely and I haven't heard enough about them. Go check them out at nakedcosmetics.com.

 This was a burgundy eye look using Naked Cosmetics Urban Rustic collection. I just love using burgundy on my eyelids for a bold look. It's a strong look, and yet takes fewer steps to achieve. This kind of round filling in of the eyelid reminds me of the look of silent film stars. It has some mystery and romance. I did very little else on my face, but I think this would look so cool with a similar lip shade for evening.
 Hooded eyes hide the burgundy when I'm looking at you.


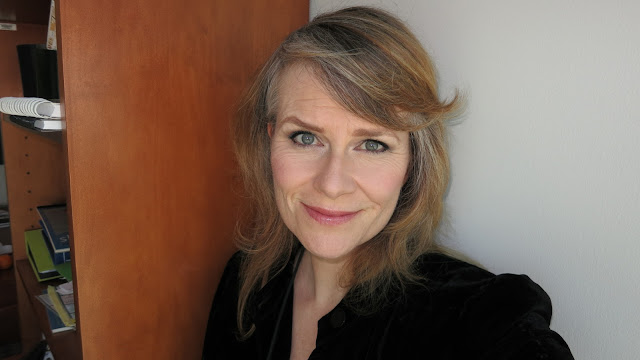
 I love this black velvet jacket. I got it at TJ Maxx a million years ago, but it's going to Paris with me.
 This aqua blue shade on my eyes is also from the Naked Cosmetics Twilight set. It's a warmer blue, slightly dreamy and tropical, but I just use it as a sheer wash here. I'm pretty sure I used the NYX jumbo eye pencil in Milk to get this look.

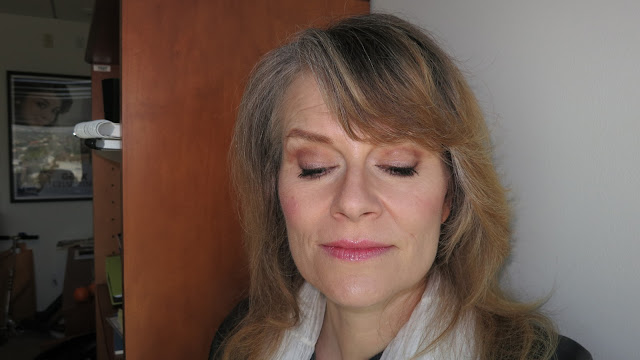
 And here's a neutral eye look with some warm browns in the crease. These kinds of shades are easy to find, but I must say, I'm still totally in love with my Mehron naturals palette. The shades are so true, matte, pigmented and blendable, and I can do an entire eye look with one brush - my bdellium 776 in the yellow bambu collection, which is a dupe for the MAC 217 brush.
 A warm pink lip shade brings out the warmth of this neutral eye look.

 Here's my Zpalette with all, and I mean ALL of my Revlon Just Bitten Balmstains depotted into it. Each of these little tins is metallic, so you can rearrange the shades to your heart's content. And I used a candle to gently melt the product into the tins, once I'd scraped them gently out of the tubes.

I also mixed together 2/3 Revlon Cherries in the Snow and 1/3 Revlon Fire and Ice for the one in the upper right hand corner. Top Left is Milani's new lipstick in Red Label.

I don't think you can do Paris without a few Red Lip days, do you?

Anyway, thanks for dropping by. Please let me know what you are up to in the comments below, and see you sooner than later, this time, Lovely Peeps!

Love, Beautyjones!

Thursday, January 10, 2013

Tarte Carried Away Palette First Look!

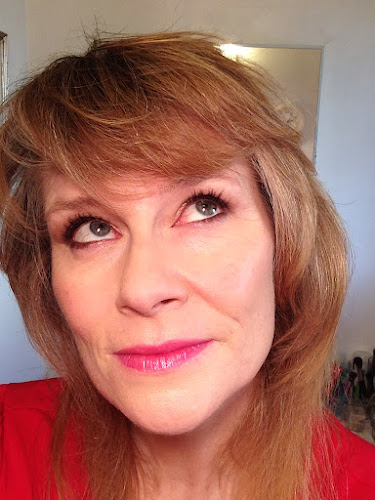
Thought I'd try out the Tarte Carried Away palette today. The result was a stronger look than any I did this week. I wore this with a bright red blouse and the reddest of the Maracuja glosses that came in the kit.

I put Georgia Peach all over the lid from crease to brow, then did a gradient from inner to outer edge of the lid: Tuscan Sun on the inner third, Coral Reef in the middle third, then Acai Jungle on the outer third, and in the crease, blended up into Georgia Peach on the browbone.

Was a touch disappointed with the pigmentation of the Coral Reef shade. It looked so bright and pretty in the pan, but took some building to get impact on my eye. Maybe it's better wet, or over a base cream like the NYX jumbo eye pencil in Milk. Acai Jungle had a bit of green in it, which was a surprise, and it made for a more strong, makeup artisty type look. I think that Acai Jungle has a color shift from brownish burgundy to deep forest green. Definitely psyched to try more of these quads, so thanks to my sister Mary for getting me this awesome kit!

What do you think?

The rest of the products were pretty much the same things I used on the rest of the looks this week. The Tarte Maracuja foundation in light is still shockingly yellow to me, but just a touch of my skin79 BB cream lightens it enough to match my skin better.

Didn't have time to do my brows. Eek! My bangs hid it, mostly.

The Maracuja red gloss wore off within an hour, so I put on my new L'Oréal Colour Caresse Wet Shine Stain in Endless Red. Have you tried these yet? I really like these! They go on wet, and once they set, they feel kind of like gelatin, lots of staying power, but they feel emollient. I think there's some alcohol in there, which evaporates and leaves that long-wearing soft slick feeling stuff. Once even that wears away, there's a stain left on your lips. Really interesting product, not like anything I've tried. Go check them out! I have the Lilac one, the Caramel one, the Red, and the the Coral.

Doing the Tinker Bell Half Marathon in ten days, People!

Hope you had a nice Thursday!

Love, BeautyJones


Tuesday, July 31, 2012

Top 10 YouTube Beauty Tips and Tricks

Let's face it, before I started watching makeup tutorials on YouTube, my makeup routine consisted of a bit of concealer, a touch of blush, some mascara, and some lip gloss. Gone are the days when that routine really brought out the best of my looks. Those days came to a close in my 30s. In my 20s I barely wore anything in terms of makeup.

But all through junior high and high school I did theater, so I learned how to apply makeup for that. Backstage I used a wet sponge and pancake makeup in Leading Lady #2 (hideous pinky foundation) navy blue Ben Nye cream makeup to cut the crease, blended not very well into white on eyelids and brow bones, a red dot near the tear duct area to "open up the eye", loads of mascara and false eyelashes, bright red blush in big dots on my cheeks, and crazy brownish red lipstick on my lips.

Which brings me to around Christmas last year, when I knew I wasn't doing the best job with my makeup, but had very little idea how to improve the situation. I'd watch a few Lauren Luke videos and several Michelle Phan videos, but when I discovered the Pixiwoos I realized how much I didn't know. And I began to collect some very useful tips.

I also began to try different things, and taking pictures of the results every day, so I could see how it was all working. I'm still learning and by no means am an expert on Beauty.


So I thought I'd show you the Top 10 things I've learned from my YouTube Gurus and, through that introduce you not only to the tips, but to my favorite gurus. I hope you'll find some new favorites yourself. And I hope you'll give these tips a try.

Let me know what you think, and if I've missed any key tips, please let me know in the comments section.

10. Prime Eyelids


If you want your eye shadow to last, and not to crease, put on a primer underneath.

Here's gossmakeupartist's review of my current favorite, Urban Decay Primer Potion. He's got some terrific basic skill videos, about applying concealer, avoiding cakey face, applying contour, and so on. He has also taught me a lot about European brands. And he introduced me to La Femme, which makes ridiculously low-priced and highly pigmented blush in any shade you will ever need.


9. Define Your Eyebrows


Eyebrows frame the face, and every great picture needs a fram. I was not doing anything with my brows before I started checking out my favorite YouTube gurus, but once I started, I realized what I was missing. All I had to do was photograph myself with and without eyebrow makeup and the difference was clear. I'm never going back.

Here's Nic from Pixiwoo's video on how to fills in brows.


8. Contour and Highlight Your Face


Lisa Eldridge's video channel is the Bentley of beauty YouTube Channels. Her blog is beautiful. Her technique is so soft and delicate. Love! Here she shows what an amazing difference contouring can make.


7. How to Apply Mascara


Seems like such a basic skill, but I kept getting blobs of black on my eyelids, and I wasn't putting it on in a way that best defined my eyes. Makeup Geek, who has her own line of makeup products, and whose site is full of inspiring makeup contests, gives some great tips here. Bonus: She also demos tight lining, which is my next Top 10 tip!


6. Tight Line to Define your Eyes


MakeupbyTiffanyD has a channel with loads of useful tips, so check her out. She is particularly good at explaining how to do things step by step. Here she uses a cake eyeliner, but I prefer to use a waterproof pencil.

I tight line myself like Nic from PIxiwoo does it. I roll my eyes back and just run the pencil along my upper water line without being able to see where it lands. I do it by feel. If you watch enough Pixiwoo videos, you'll see her do it many times. I think because this is a tricky thing to do so close to the sensitive parts of your eyes, each person needs to experiment and do it in a way that feels most comfortable to them. You may opt not to tight line, but I find that it always gives my eye look that extra something. And I don't like the way bare skin looks between my upper lashes, so I always do this, if I have time.


5. How to do Liquid Eyeliner


Here's MakupbyTiffanyD showing exactly how to do winged eye liner. This one is gold, so check it out! Once you master this technique you are ready for anything from that super-dramatic Madmen looks to just a basic every day eye liner look. I prefer to use my Milani pen. I find it's easiest to get a clean line with a felt-tip applicator. Maybelline also has an amazing felt tip eye liner pen, but I haven't been finding it in CVS lately, so maybe they are developing different packaging. You don't need a fancy department store version of this, though, so check out the Milani one, or go to Ulta and get the NYX one.


4. Cut Your Own Hair


I feel strongly that hair cutting is not rocket science and therefore, if you have a good eye and a steady hand, you can do it yourself. Rosebud143 gives you a simple technique to get her pretty layered look. If this video doesn't give you what you need, do some research. Ric Altieri has some great hair cutting demos on YouTube that are part of a professional hair cutting program. And there are many many more that can get you the techniques to achieve the look you want.

Yes, it takes practice, and courage, but before I did this, I was paying over $100 for a haircut and giving up around 5 hours of my precious free time every 2 months to get my hair done. I have huge respect for professional hair stylists. But I myself am not made of money, so I bought some shears and a raser comb and now I feel much more free now that I do it myself. I wouldn't go back.


3. Conceal Under-Eye Circles and Blemishes


A smooth polished look can't be achieved without concealing bluish, dark and reddish areas on the skin. We all have them. Here's Lisa Eldridge, whose careful technique has taught me so much. It is particularly important to get the right color for what you are concealing.


2. Get the Most out of Lipstick


Lisa Eldridge made this wonderful video on how to use 1 lipstick 4 ways. These skills mean you have to carry fewer products. It's like multiplying the space you have in your makeup bag!


1. Apply Foundation


Foundation doesn't have to be only for special occasions. With a Beauty Blender, you can apply a very thin layer, and it can make all the difference in your everyday look. If full on foundation is too much, you can use a tinted moisturizer. Personally, I use skin79 Hot Pink Super+ Triple Function Beblesh Balm, a Korean BB cream (with a redunkulously long name!) that has an amazingly high SPF, and has brightening and moisturizing ingredients. You can get it from Amazon.com here.

Here's Cora of VintageorTacky showing her full technique for flawless skin. I love watching her videos. She has a whole Disney Princesses series. She has a pale hard to match skin tone, so her talk on how to match your skin is really helpful. She does bold and gorgeous looks.

Have I mentioned that I love bright colors? I definitely have a punk side. Sometimes there's nothing more fun than a big, over-the top bright makeup look with full on false eye lashes. If that's what you're looking for, Cora is your gal. She's a genius at it, in fact.  Enjoy!


I hope this post was helpful and introduced you to some new favorite YouTube gurus. There is so much out there to learn about beauty, and I, for one, plan to keep watching and learning.

Have a beautiful day!

Love, :)BeautyJones

Saturday, March 3, 2012

First Post and Revlon Colorburst Lip Butter

If you've followed my other blog, you know I've been obsessed with cycling, food and libation for quite some time. But during the off season, I have found myself enamored of beauty YouTube channels and blogs. I have noticed a lack of shall we say "mature" beauty YouTubers and bloggers out there, so here goes me, blogging about beauty.

And now for the Revlon Colorburst Lip Butter.... the smoothness, the way it stays on, the beautiful color payoff that still manages to be sheer, even in the brightest shades. This is a cult product for all of these reasons, and now that the furor seems to have died down at the drugstores, you can actually get all of the colors you want.

The image shows all of the shades I own. I was able to stop at 10, for now. There are 20 shades total. From left to right, mine are: 060 Gumdrop, 085 Sugar Plum, 010 Raspberry Pie, 090 Sweet Tart, 005 Sugar Frosting, 025 Peach Parfait, 015 Tutti Frutti, 035 Candy Apple, 001 Pink Truffle, 095 Crème Brulée.

Faves of these are Crème Brulée, which is such a nice vanilla nude with gold glimmer, Candy Apple, a bright warm red that is sheer enough to wear to work, Tutti Frutti, which satisfies my need to own a a lipstick in this year's Pantone shade of the year, Tangerine, and Sugar Plum, a friendly everyday, yeah, you guessed it, plum.

Other shades I'm considering: Red Velvet, which I think is a cool red that will make my teeth look whiter. (Gotta get me some Crest strips or some kind of whitening system, because, damn!) Also might get me Lollypop, the bright fuchsia shade, even though I already have a Sephora lipstick that color. Might get the Berry Smoothie color, since Fleur de Force on YouTube is so gaga for it, and she's a blonde like me.  But probably I should hold off, since my medicine cabinet lipstick holder is now over-full. If this goes on, I definitely see some stacking makeup storage in my future.

These are so easy to apply and go.  No blotting needed.  You don't even have to concentrate super-hard on making a pretty clean line. They work like a gloss, last like a lipstick, and feel like a balm. Love!

Well that's it for the first post. Thanks for reading, now go have fun!